
Cobra and dropbacks are some of most basic shapes in contortion, but they also seem to be the postures that my students are the most confused about, partially because coaches tend to give conflicting cues in regards to these moves. In both these shapes, the tendency is to crunch into the lower back and not use the hips. In this (I hope) concise blog, I will list some of the common cues given for these shapes and what they actually could mean.
Cue 1: “Squeeze Your Butt In Cobra”/ “Relax Your Butt”

Both these cues can actually be right! Firstly, for the purposes of contortion, it helps to break down butt engagement into three parts: the glute maximus (“big butt” as I call it), the glute medius + glute minimus (the “side butt”) and the under glute muscle (not technically your butt, but the upper part of your hamstrings, also the biggest worker in cobras!). The side butt not only helps with stabilization of the pelvis and bringing your leg out to the side, but also helps in moderating internal rotation alongside the glute max. Cobra requires somewhere between internal and external rotation of the hips, meaning you’re both turning in and out at the same time! As such, the side butt and your underbutt are the main workers, *not* your glute max.

Oftentimes, when people hear “squeeze your butt”, they will automatically squeeze their glute max too strongly, which can actually cause more pressure on the lower back and block the hips from lifting. If you’re doing so, you may actually want to relax your butt a bit so you can make space for the other parts of your butt to work. Engagement of the side butt and the underbutt works via the inner thighs and lower abs. A better cue, here, would be “pull the inside of your knees towards each other to spiral out the hips, as if you’re pulling a band apart between your thighs”.
Take note that this over-squeezing of the glute max tends to also happen subconsciously, perhaps because of the body over-compensating due to feelings of panic or lack of proprioception. The body tends to do this in positions such as box, scorpion elbow & handstand or camel. When you’re doing camel or box, try focussing on your knees and feet pulling apart instead and take note of what muscles are working! Likewise, in scorpion handstand or elbowstand, it may be more beneficial for you to focus on using the low abs to lift the butt over and a slight inner thigh engagement to help the legs descend down rather than squeezing your butt deliberately. This is as the lower belly muscles help stabilize the pelvis via a posterior pelvic tilt so the pelvic floor muscles can engage, which in turn allows you to relax your hips down!
Cue 2: “Push Your Hips Into The Ground In Cobra” / “Lift Your Hips Off The Ground In Cobra”
Often times, coaches will ask students to push their hips into the ground while others will say to lift your hips off the ground, but what do they actually mean? This is all rather confusing, so let me explain why both of these cues are, in their own way, correct.

So firstly, the cue ‘pushing hips into the ground’ is actually supposed to encourage you to use your legs a bit more actively. However, this cue is also quite vague. One thing I like to focus on initially is pulling the inside of your knees in via your inner thighs so you feel your hips push into the ground. This anchors your legs down so your upper body doesn’t feel too heavy. From there, you use your lower abs, glutes and front abs to lift up and over so the hips can, yes, eventually leave the ground.

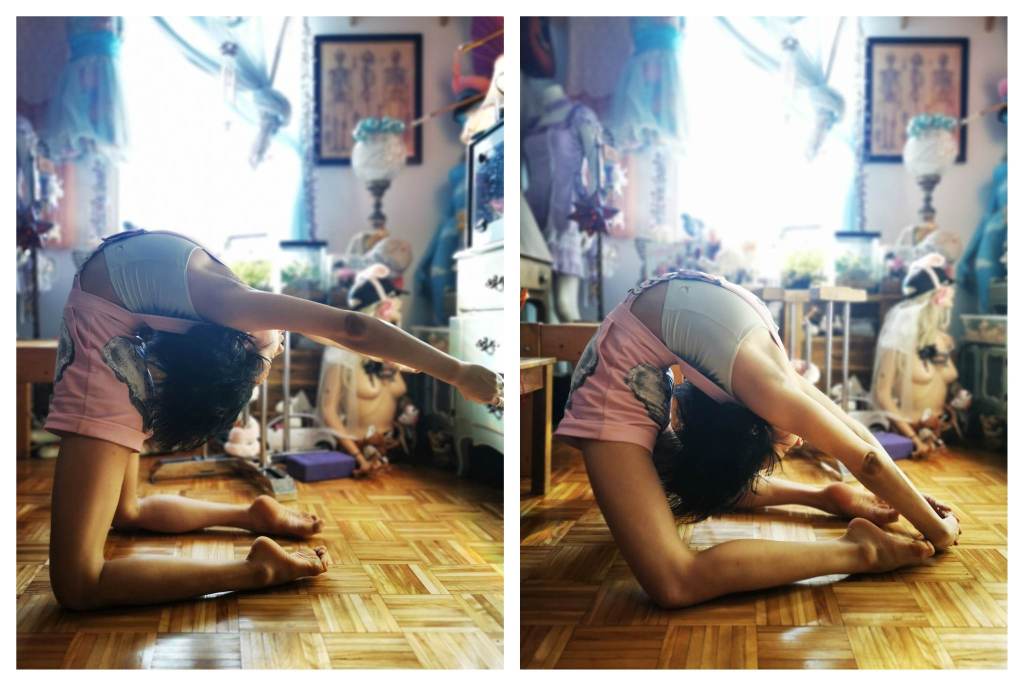
For perspective, the highest point of your flying cobra should actually be your hips, not your lower back or ribs. If your ribs or belly are poking out of your flying cobra, you are probably compensating through the mid or lower back. One way to fix this is to pull in and up through whatever part of your front body is sticking out to lift the body more towards the knees. In an ideal world, optimal hip extension creates an at least 45 degree angle between your belly and the ground, placing your head almost on top of your knees! If you do this, you will feel flying cobra is quite light, and you’ll even have the freedom to play around in it!
One useful thing to try for cobra, in general, is to put a band around your ankles, calves or thighs or push just your toes into the wall so your knees are off the ground. Both of these modifications will force your legs to work a little harder so you’ll be conscious of what’s actually happening in your body. Do take note and observe what muscles turn on/ off to help your hips to lift or how pulling your feet apart or together changes your bend. These are all details that you can modify based on your individual body to feel the most hip lift!
Cue 3: “Keep Feet/Hips Parallel In Dropbacks“/ “Turn Out your Feet / Hips In Dropback”
So, this is a ‘controversial’ topic and the answer is again… It depends! Someone with natural internal rotation of the hips may find it valuable to turn out a bit more consciously through the inner thighs. Likewise, someone with natural external rotation of the hips may find it easier to turn in more than average.
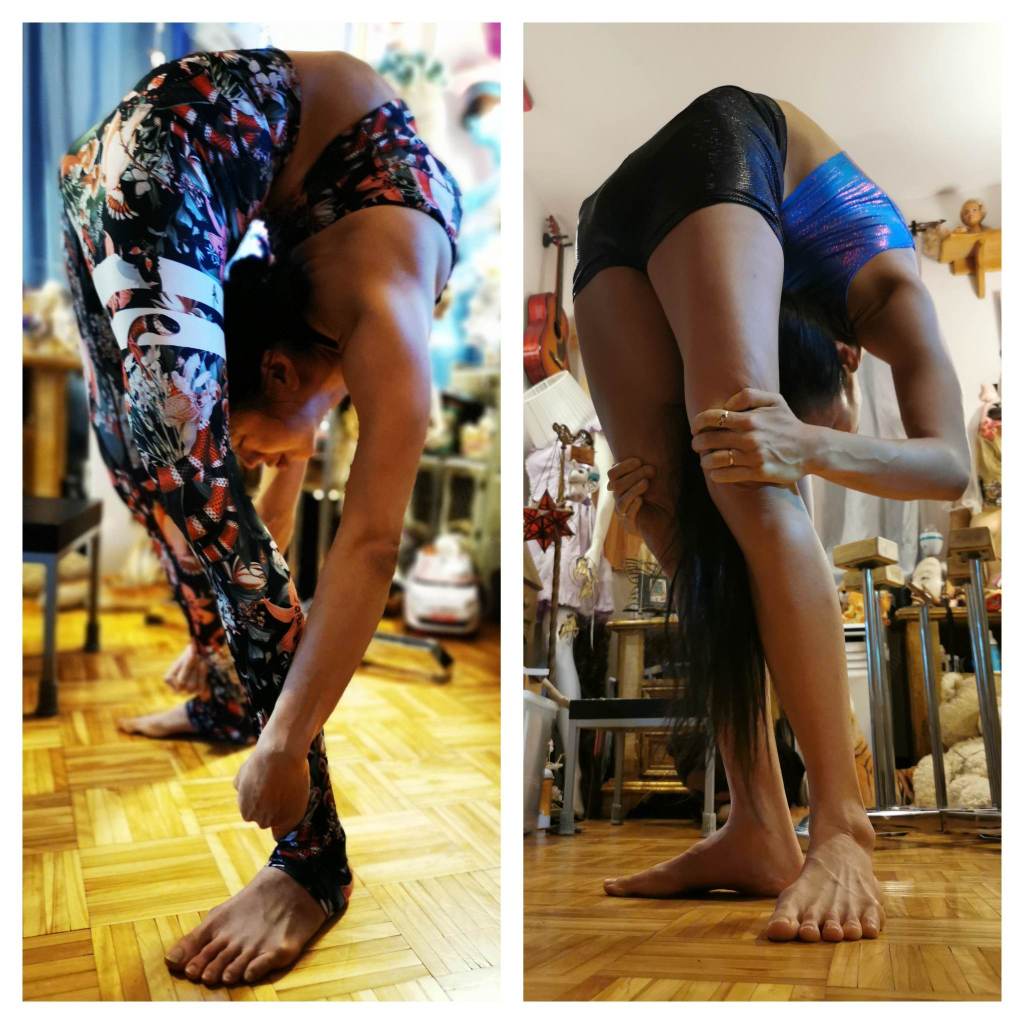
Firstly, it helps to consider that feet turn out =/= knee or hip turn out. One can have completely parallel feet and turned out hips, and vice versa. It helps more to think about what your inner thighs are doing (are they rotating outwards (too loose) or inwards (too tight) too much?) and how that helps your hip extension. Someone with naturally bowed legs may benefit from having a band around their thighs to isolate the inner thighs to turn out hips rather than just turning out the feet. Likewise, someone with natural turn out may need to turn in slightly through the inner thighs and hips to find the right rotation for them.
As a coach, I’ve seen both: people with bowed legs (internally rotated hips at rest) and turned out legs (hips just turn out passively at rest). Both types of body would require different cues, also depending on the person’s body awareness and how they connect their low abs to their hips, deep rotators and inner thighs. As such, saying “you must have parallel hips” or “you must turn out your feet” is counter-productive. Notice what your habits are at rest and adjust accordingly.
One useful exercise to try is to put a band around your thighs while standing and push your hips forward and outwards slightly (spiral away from body) without bending the lower back. From here, try to notice how pushing your big toes and the insides of your legs as if you’re pulling the group apart helps your hips to extend upwards. What do you feel? Do you feel your under-glutes and side glutes working? Do you feel your inner thighs helping your hip extension? Do you feel you may need to turn in or out to extend your hips? What about your pelvic floor engagement? Sometimes, just cultivating awareness is a skill that should be developed individually so you know how to modify cues for you.
The band not only accomplishes more awareness of whether your hips are internally/ externally rotating too much, but it also helps you to engage your tensor fascia lata (often very weak in hypermobile people) which adds to pelvic stability for deeper shapes!
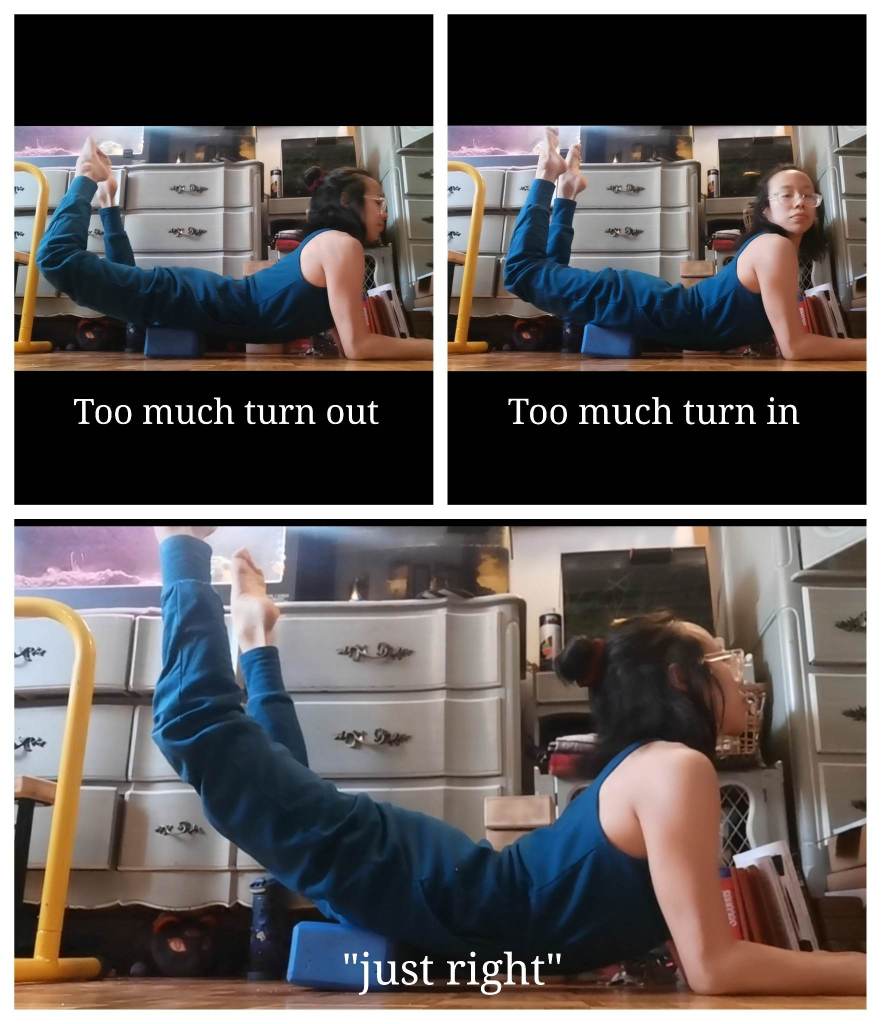
Keep in mind that you don’t want your feet *too* turned out or far apart. There is a sweet spot for hip engagement in contortion that’s not too turned out or in, just somewhere in-between, just like Goldilocks’s porridge. One way to understand how much is ‘just right’ is to go on your elbows with your hips elevated on a block. Bend your knees and put your feet together so you’re more externally rotated. Then, roll in and up and notice how much internal rotation actually creates a higher angle in the hip. But if you overdo this, the hips also get blocked. This can also be done with straight legs! This engagement carries over to many things: cobras, dropbacks, teardrop, scorpion handstand or elbowstand and camel.
Cue 4: “Push Your Hips Over Your Ankles In Your Dropback”
This isn’t exactly a bad cue, but one that’s often misinterpreted. More commonly, I see students hinging forward to the point of no return or crunching in their lower back. To explain this better, let’s bring out one of my main contortion methodologies…
In Contortion, We Love Spirals and Circles, Not Angles and Squares! So, Be A Circle. Don’t Be A Square!
One thing that’s helpful to remember is that contortion is always about spirals/ circles. We don’t want angles/ squares- this usually means you’re not engaging or you’re crunching into your back. So your hips aren’t just going forward over your ankles; your inner thighs are actually spiraling outwards to open your hips, while your hips are lifting forward, up and back like a circle. If you think in terms of these two directions- spiral in /out, circle forward, up and back- both cobras and dropbacks will make a lot more sense.
So in a way, rather than saying ‘hips over ankles’ for dropbacks or teardrop, a cue that may benefit students more is “push your hips over your ankles *then* upwards like a circle, while visualizing your hip bones spiraling slightly outwards through the inner thighs”.

The prior cue of pulling the ground apart with your big toes will also help here. This anchor will help you feel how your inner thighs actually help your hips to spiral outwards (turn out). A band around your thighs will also accomplish a similar muscular engagement: pulling the band apart will help you understand how your inner thighs help your hips to lift up.
This also applies to your lunge! We want to use the lower abs to pull the back hip forward to make that lovely C aesthetic without your front hip deviating sideways or forwards. Pretty much, if the angle of your hips looks like a V rather than a C, you’re probably not using your hips properly.
To Sum It Up…
A lot of this post focussed on hip engagement. However, I need not say your upper body (shoulders, neck and upper back) are equally as important in ensuring a healthy bend. For the purpose of conciseness, I am only addressing hips and low core engagement. However, you should take a look at these posts: “Why Can’t I Fly my Flying Cobra?” and “Why Do My Shoulders Tingle in Bridge and Full Cobra?” for further elaboration on how to use your low abs and upper back to avoid lower back pain.
If you learn anything from this post: look for spirals and circles! Not just in your hips, but also in your backbend. This will help you a lot in examining how your individual body bends and how to correct it for optimal sustainability! Also, when a coach gives you a cue, try to figure out what it means for *your* body. Not all coaches will adjust cues for each individual, so cultivating an understanding of your own individual proclivities is important in being able to modify drills for yourself. And, in my opinion, a good coach will always give you the tools to be able to do so!
Acknowledgements
Thank you to Mor Mualem, a physio who works with yogis and circus humans, for proofreading and adding some interesting anatomy notes!
